Installing Flexible Solar Panels: Easy & Reliable DIY Guide
Table of Contents
Installing flexible solar panels is a growing trend among RV enthusiasts looking to enhance their off-grid power capabilities. In this guide, we’ll explore the steps involved in bringing the power of the sun to your travels.
Flexible solar panels offer a lightweight and adaptable solution that’s perfect for RV roofs. With careful planning and the right equipment, anyone can embark on the journey to energy independence with this technology.
Step-by-step RV solar setup for beginners
Installing flexible solar panels on your RV doesn’t have to be intimidating. With the right approach, it becomes a straightforward project that can be completed in just a few hours. Let’s break it down into manageable steps.
1. Planning Your Solar System
Before purchasing flexible solar panels, calculate your power needs. Consider what appliances you’ll run and how much energy they consume. This determines the number and wattage of panels required. A typical RV might need anywhere from 100 to 400 watts of solar power, depending on your energy consumption habits.
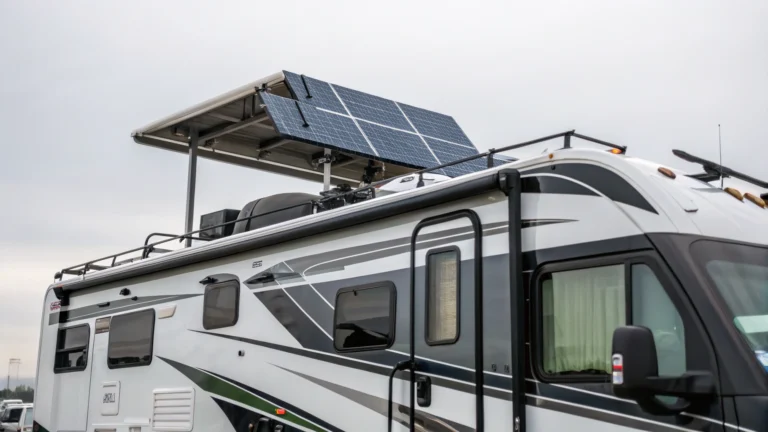
Next, survey your RV roof to identify potential mounting locations. Measure available space and note any obstacles like vents, air conditioners, or antennas. Flexible solar panels work well because they can conform to slightly curved surfaces and be installed around these obstacles.
2. Gathering Necessary Equipment
For installing flexible solar panels, you’ll need:
– Flexible solar panels (appropriate wattage for your needs)
– Solar charge controller (to regulate power flow)
– Deep cycle batteries (if not already installed)
– Wiring and connectors
– Adhesive (specialized for RV roof material)
– Cleaning supplies
– Basic tools (screwdriver, wire cutters, drill)
– Multimeter (for testing connections)
Quality components are crucial when installing flexible solar panels. While it might be tempting to cut costs, investing in reliable equipment ensures better performance and longevity. Best RV Battery Setup for Worry-Free Off-Grid Adventures provides additional insights on enhancing your setup.
3. Preparing the Installation Area
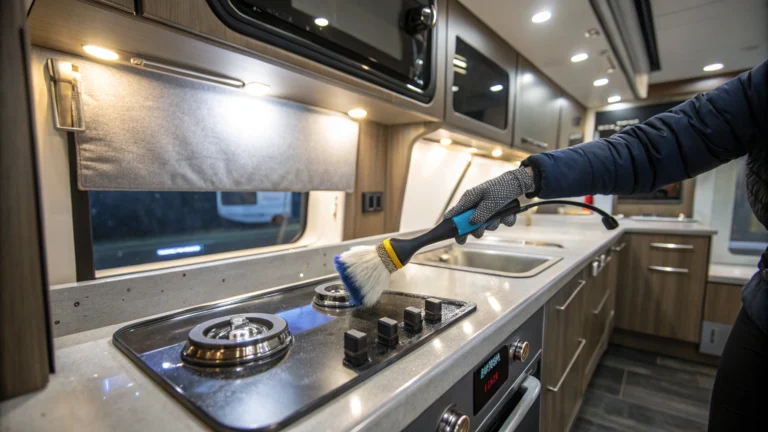
Thoroughly clean the installation surface. Any dirt, grease, or moisture can prevent proper adhesion. Use an appropriate cleaner for your roof material—typically rubbing alcohol works well for removing residue without damaging surfaces.
After cleaning, mark the exact placement of your panels using masking tape or a washable marker. This helps visualize the layout before committing to permanent installation. Ensure panels won’t shade each other and are positioned to maximize sun exposure throughout the day.
Flexible Solar Installation Tips | Tools, tricks, and getting it right
4. Mounting the Panels
When installing flexible solar panels, you have two main mounting options:
Adhesive mounting: Most popular for flexible panels. Apply specialized adhesive to the back of the panel or directly to the roof in strips. Press firmly and hold according to adhesive instructions. Some installers add a thin bead of sealant around the edges for extra protection.
Bracket mounting: Some flexible panels come with grommets allowing attachment with small brackets. This method creates slight airflow beneath panels, which can help with cooling but requires drilling into your roof.
When installing flexible solar panels using adhesive, work on a warm day (ideally 60-80°F) for optimal adhesive performance. Apply even pressure across the entire panel to prevent air bubbles. Many RV owners walk gently across panels (in clean shoes) to ensure complete adhesion.
5. Wiring Your Solar System
Plan your wiring route carefully. Most installations run wires through a refrigerator vent or specially installed cable entry port. Avoid drilling new holes in your roof whenever possible.
When installing flexible solar panels, connect them according to your system design—either in series (higher voltage) or parallel (higher current). Your choice depends on your charge controller specifications and battery system.
Use weatherproof MC4 connectors for panel connections and appropriate gauge wire based on your system’s amperage. A good rule of thumb: larger systems need thicker wire to prevent voltage drop.
6. Installing the Charge Controller
Mount your charge controller in a dry, accessible location near your batteries. Most RV owners choose compartments that already house electrical components. The controller should be installed between your panels and batteries.
Wire the controller following manufacturer instructions. Typically, you’ll connect the battery first, then the solar panels. This prevents potential power surges. Most modern controllers have clear labeling for connections.
7. Testing Your System
After installing flexible solar panels and completing all connections, it’s time to test. Use a multimeter to check voltage at various connection points. When exposed to sunlight, your panels should generate the expected voltage.
Monitor your system through a complete charging cycle. Most charge controllers have indicator lights showing proper operation. Verify that batteries are receiving charge and that the controller properly regulates power flow.
RV Energy Solutions | Boost off-grid power and panel durability
Maximizing Panel Efficiency
After installing flexible solar panels, regular maintenance ensures optimal performance. Clean panels monthly or whenever visibly dirty. Simple water and a soft cloth are usually sufficient—avoid abrasive cleaners that might damage the panel surface.
Position your RV to maximize sun exposure when parked. Even partial shading can significantly reduce solar output. Some RVers use tilt mounts to angle panels toward the sun, especially during winter months when the sun is lower on the horizon.
Extending Panel Lifespan
Quality installation is key to longevity when installing flexible solar panels. Ensure panels aren’t constantly flexing during travel—a common cause of premature failure. Some RV owners add thin strips of support beneath panels at strategic points.
Inspect adhesive bonds periodically, especially after extreme weather conditions. Catching a loosening edge early prevents wind from getting underneath and potentially damaging the panel.
Protect wiring connections with additional weatherproofing. UV-resistant cable covers and weatherproof junction boxes extend the life of your electrical components significantly.
Troubleshooting Common Issues
If your system isn’t performing as expected after installing flexible solar panels, check these common culprits:
– Loose connections at panels, controller, or batteries
– Incorrect controller settings for your battery type
– Panel surface contamination reducing light absorption
– Unexpected shade from RV accessories or nearby objects
Most solar system problems are easily fixed once identified. Keep your system’s documentation handy for reference.
Installing flexible solar panels on your RV provides freedom and convenience for off-grid adventures. Their lightweight design, conformability to curved surfaces, and simple installation make them ideal for RV applications. By following this guide and taking time to plan properly, you’ll create a reliable power system that enhances your travel experience for years to come.
Remember that your first solar installation might take longer than expected, but the learning process is valuable. Many RV owners start with a modest system and expand as they become comfortable with the technology and better understand their power needs. Whether you’re a weekend camper or full-time RVer, installing flexible solar panels is an investment in self-sufficiency and sustainable travel.
As an Amazon Associate we earn from qualifying purchases.
Shop Related Products:
- Find flexible solar panels on Amazon
- Find solar panel mounting kits on Amazon
- Find solar charge controllers on Amazon
- Find battery monitors on Amazon
- Find portable power stations on Amazon
Frequently Asked Questions
How do you install flexible solar panels on an RV roof?
Clean the roof, plan the layout, use adhesive or mounting hardware, wire the panels, and connect to your RV’s electrical system.
What tools are required for installing flexible solar panels?
Typically, cleaning supplies, adhesive, wiring kits, a drill, and basic hand tools are needed.
Are flexible solar panels durable for RV use?
Yes, they are designed to handle travel vibrations and varied weather, but quality and installation method are crucial.